Summer residents and gardeners are well aware of how difficult it is to manually prepare your land for planting in the spring, take care of plants during the summer and harvest, while preparing the soil for wintering at the end of the season. However, now “not in the yard” are not Soviet times, when manual labor on their land plots was practically uncontested. Therefore, in special stores you can buy mini-equipment for plowing, cultivating and other tillage.
Why is it necessary
At the moment, there are several types of mini-equipment for cultivating the land:
- motor cultivators;
- motoblocks;
- mini tractor.
The insight comes immediately after the owner of the cultivator understands that his cultivator is only able to loosen the soil with milling cutters, and it is impossible to use attachments while working on this unit for the following reasons:
- low power
- unreliable gearbox (downshift);
- lack of wheels.
However, the purchase money has already been spent. Therefore, the question arises before the owner of the cultivator, whether it is possible to remake it into a walk-behind tractor.
What will be needed and how can I redo it
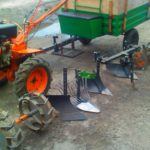
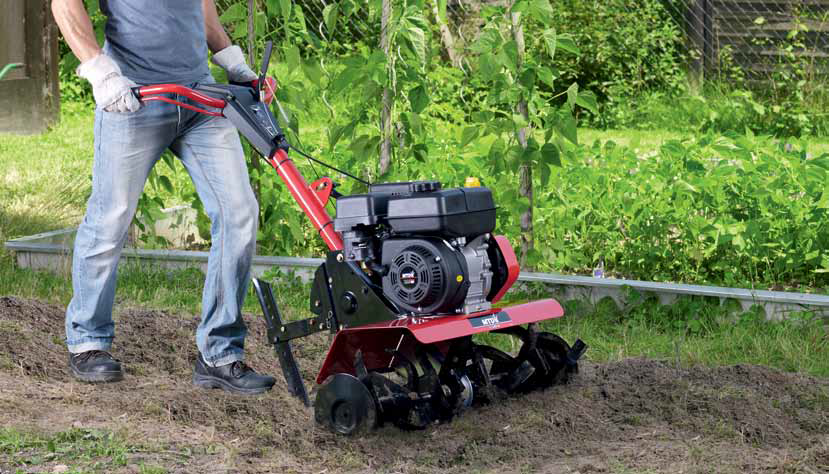
In fact, putting the tractor on wheels is not at all difficult:
- First you need to carefully measure the landing dimensions of the output shaft, paying particular attention to its shape (cylinder or hexagon), the outer diameter and the distance to the hole for the cotter pin.
- Then you need to visit the nearest horticultural store or look on the Internet to order hubs (differential amplifiers) corresponding to the size of the cultivator shaft.
- At the same time, you can purchase wheels (the smaller the diameter, the better) for your future walk-behind tractor. By the way, often wheels with hubs and drawbar are sold in a single set, which is very convenient.
- We fasten the purchased wheels to the hubs;
- Remove the cutters from the shaft of the cultivator;
- Install the wheels on the gear shaft.
Experts do not advise upgrading low-power cultivators weighing up to 45 kilograms and equipped with a worm gear in this way, since this alteration can lead to serious damage.In addition, when remaking a cultivator into a walk-behind tractor, do not use old car wheels (too much weight and size).
At the same time, it is worthwhile to understand that a cultivator on wheels, for the alteration of which at least three thousand rubles is required, it can also be a walk-behind tractor, but not quite full-fledged. Such a technique will certainly be able to move independently, but using attachments can cause serious problems if the cultivator has a weak motor (less than 6 hp) and a worm gear reducer, rather than a gear, belt or chain type.
Therefore, the next step in the conversion of the cultivator into a walk-behind tractor should be the replacement (if necessary) of the gearbox. The cost of this part in stores is comparable to the price of a new cultivator. However, you can try to make the simplest gearbox with two opposite shafts at home, if the owner of the cultivator has the skills of a good locksmith / designer and has:
- measuring instruments (ruler, vernier caliper);
- spare parts and consumables (bearings, gears, belts or chains, pulleys, shafts, gaskets, oil seals, pipe for bearings, bolts, etc.);
- welding machine;
- drill and drills of different diameters;
- "Grinder" or hacksaw for metal;
- screwdriver and vise set.
If all this is available, then you can start manufacturing the gearbox:
- We draw or search the Internet for a suitable sketch and calculate the gear ratio, taking as a basis the number of idle engine speed plus 10%.
- We make a cutting of a metal sheet with a thickness of at least 5 mm. To get a blank of the cover and the body of the future part.
- We cut the pipe, and with the help of welding we establish the seats for the bearings.
- We assemble the case and protect it with a paintwork.
- Mount bearings.
- We manufacture and process shafts from round steel bars.
- We install shafts with the simultaneous installation of sprockets or pulleys, chains or belts.
- We make a gasket between the body and the cover, as well as isolate the shafts with glands.
- Fill the case with lubricant (oil) and install the cover.
- We place a homemade gearbox on the cultivator frame and connect to the engine through the output shaft.
- We adjust the operation of the gearbox with the engine turned on, but without special loads, so that the parts are run-in.
Does it work
In fact, altering the cultivator into a walk-behind tractor will require substantial cash and time costs from the owner with an unclear result. Therefore, gardeners and gardeners at the stage of purchase is better to decide why they need mini-equipment for cultivating the land, and only after that make the final choice.